Area Lighting
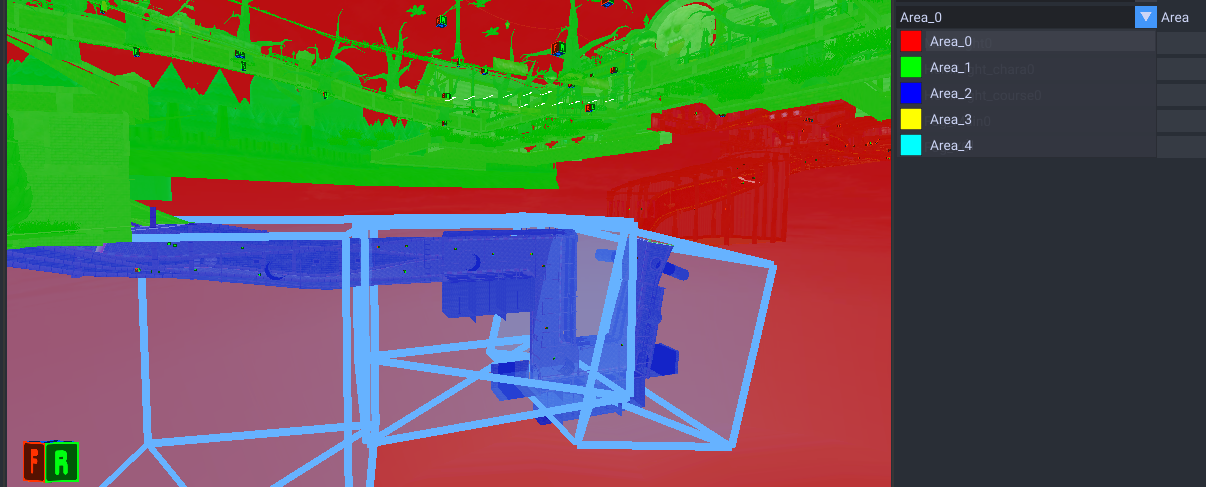
Lighting for maps are divided into areas. The dropdown for areas will display in color what material use what.
Sun
The sun controls the color/direction and amount of light in the whole scene. Nightime maps use around 0.4 for amount while day time may use over 2.0. The direction will affect shadows.
Tips - The direction should always be negative for the Y value so it points down. - The color should be yellow for day time and a light blue for night time.
Hemi Lighting
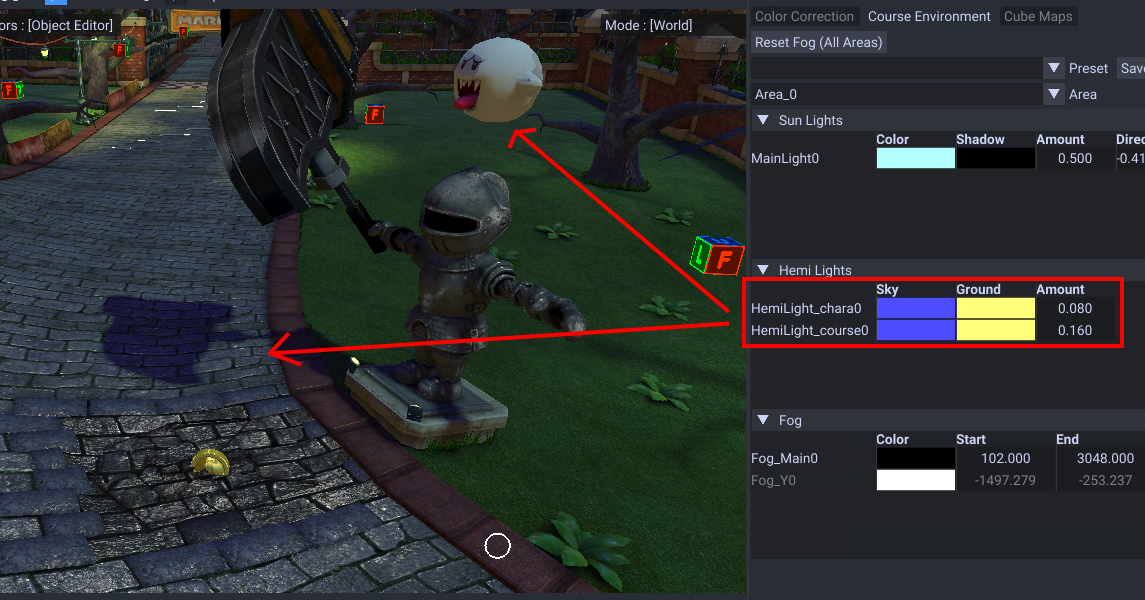
The lower and upper light color. Generally more noticable in nightime maps and can affect the shadow color. The chara hemi light controls drivers, items and map objects. The course affects the course model.
Fog
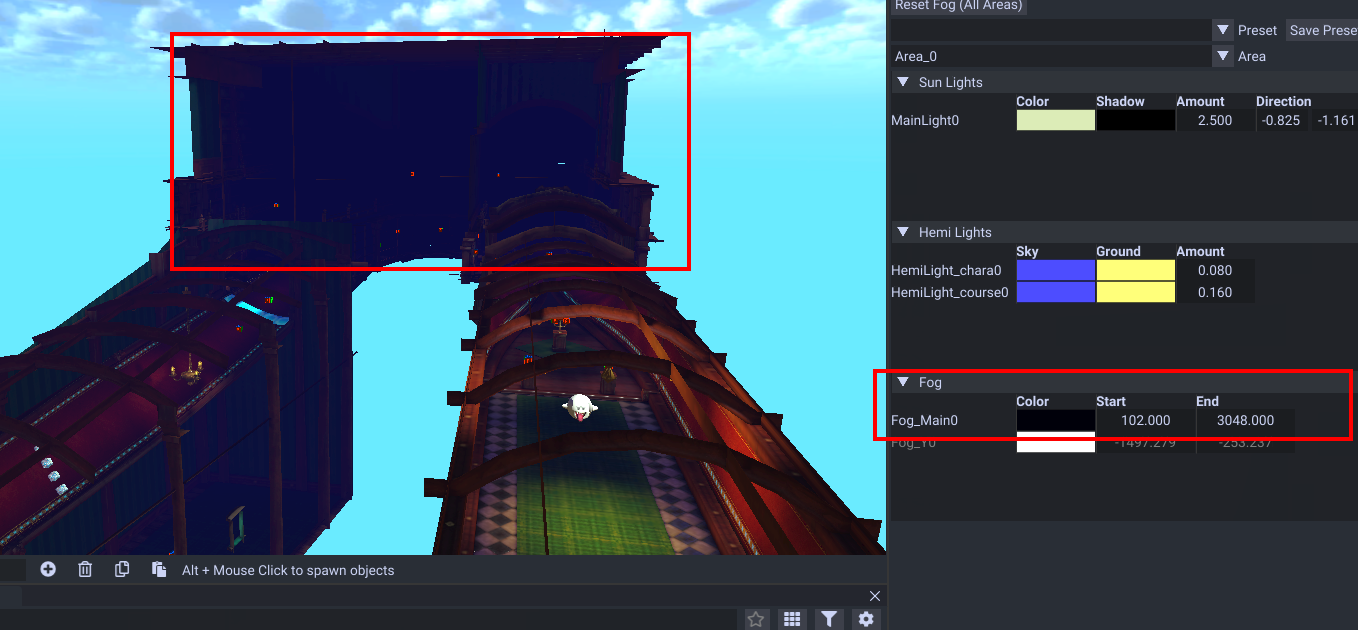
This controls the amount of fog from the camera. The start value is the amount to display from the camera and end is where the fog will end at.
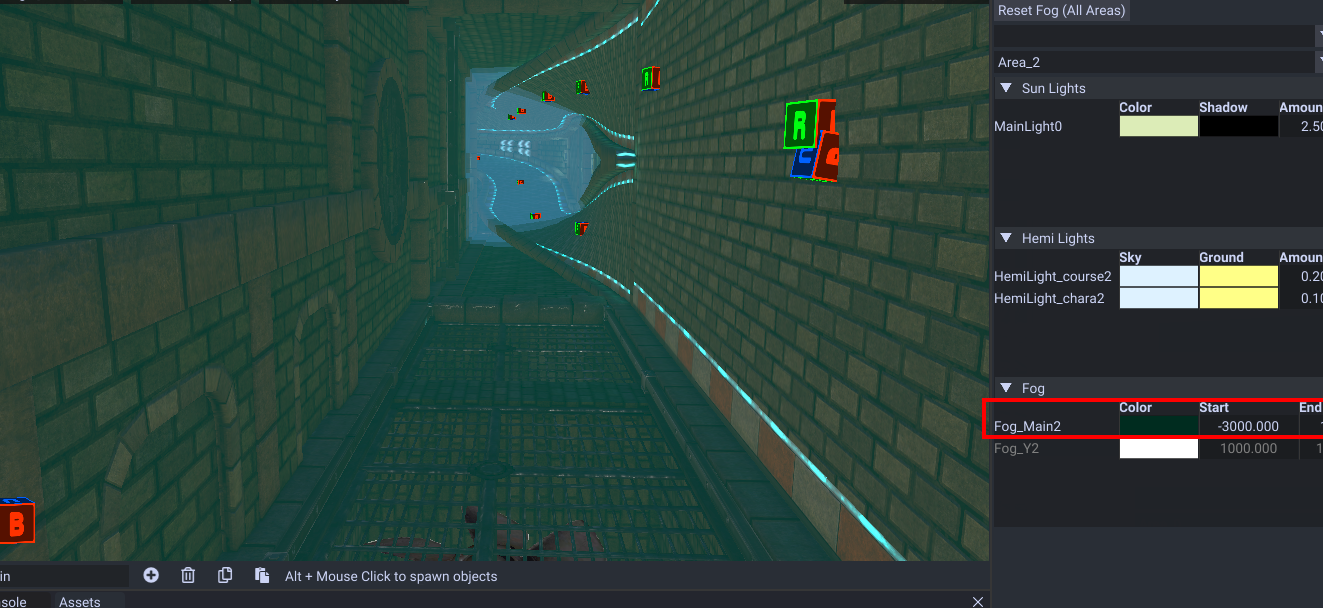
Fog can also be used for water areas. If the start area is negative, it is behind the camera. The smaller the value, the more dense it will be.
Example editing
This video shows the process of making a map day time by adjusting the light amount and skybox.
What determines the areas on materials (advanced)
- Hemi light and fog link to materials by the gsys_area_env_index_diffuse parameter. This index value determines which area to use on the material.
- Bloom is linked by materials from the render info property gsys_env_obj_set. This determines which area to use.
- Map objects use the bounding boxes found in collect.genvres.
The index value is used in place of which area to use.
Example:
- HemiLight_chara#
- HemiLight_course#
- Fog#
Materials with 0 uses course0/chara0, and materials with 1 use course1/chara1, and so on. This applies to fog# too.